Pyblish Lite

Hi all,

I’d like to introduce you to a new graphical user interface for Pyblish, one with focus on compatibility.


Goal

This project is written in Python 2.6 to 2.7 with support for Python 3. It must be immediately compatible with PySide, PySide2, PyQt4 and PyQt5, which means the graphical feature set must abide to the lowest common denominator.

Pyblish Lite will be provided and directly usable in a vanilla install of Pyblish, either via pip or a git clone. Users may then choose to “upgrade” their experience with Pyblish QML.

Because it is written with widgets it should be more familiar, so I’d expect modifications and additions to be more approachable from a community point of view, as opposed to QML which is still new and daunting.


Motivation

Pyblish QML is the future in terms of technology and capability, but it is naturally complex due to (1) coordinating both a Python client, Python host and QML run-time and (2) due to its dependency on PyQt5.

I’d like to give users a choice about whether they want to maximise features or maximise compatibility, and that’s what Pyblish Lite is providing.


Status

This GUI has been modeled after Pyblish QML and currently runs fine; it utilises the same logic as Pyblish QML and will behave accordingly. It does not however provide much interactivity or feedback.

That’s where you come in.

I’ve put up the basic building blocks for a fully featured GUI, including basic model/view separation and styling via CSS. However it is currently lacking.

  1. Interactive items
  2. Feedback

At the moment the project is small and should be easily understandable. Feel free to submit feature requests as issues or get right down to extending it with your existing knowledge of PySide or PyQt.


Help

I’ve built this project for you. I hope that it should ease the troubles involved in maintaining Pyblish QML in your facility and that you should have an easier time contributing to it. I’d like to think the primary reason Pyblish QML has seen so little development over the course of last year is due to its language barrier. This project should prove whether that is the case.


Enjoy!

Test it out and let me know what you think.

$ git clone https://github.com/pyblish/pyblish-lite
$ cd pyblish-lite
$ python -m pyblish_lite

amazing work Marcus!
this should definitely make life easier for us old timers on outdated OS’s

1 Like

A Tour of the Code

At the moment, the code is very minimalist and straightforward, I’m expecting the contents and overall layout to change rapidly. Pull-requests are welcome.

To ignite this fire, here’s a quick walkthrough of how things currently are.


Project Layout

pyblish-lite/     | The main Python package, containing a __init__.py
  font/           | Font assets, in .tff format
  img/            | Image assets, in .png format
  __init__.py     | 
  __main__.py     | This makes the module executable via `python -m pyblish_lite`
  app.css         | Application stylesheet
  app.py          | Main application source, to be divided into app.py and control.py
  model.py        |
  util.py         | Generic, shared functionality
  view.py         | 
README.md         | 
LICENSE           | LGPL


Stylesheet

The look of this project is entirely governed by CSS, the only exception being properties that it cannot modify. This includes colors and fonts, but also sizes, padding and position offsets (overall positions are governed by QLayout’s).

Documentation


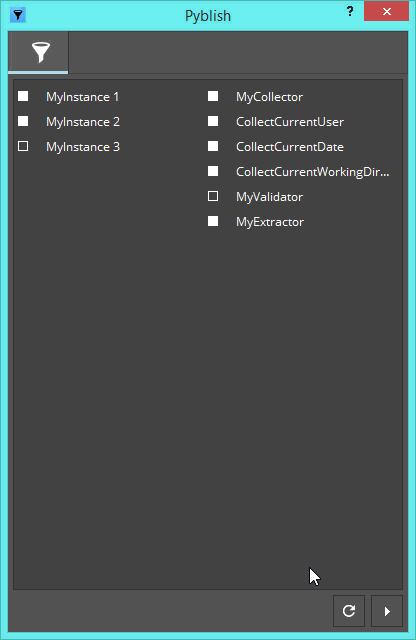
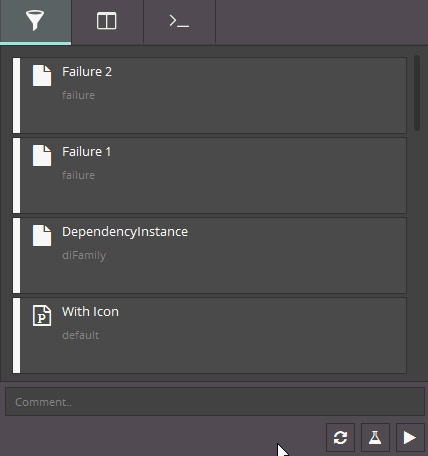
Model/View separation

Similar to Pyblish QML, this project separates between what is drawn and the information upon which drawing is based. It is very important to keep communication in app.py (later control.py), persistent data in model.py and graphics in view.py.

If in doubt, start in control.py and look for ways to extract code into either view.py or model.py. In general, anything that requires thought or handling of any kind is best suited for control.py, whereas information processing and storage functionality goes into model.py. Finally, custom widgets and drawing goes into view.py, including delegates.


Weak spots

Most things are pretty straightforward and should last, whereas others need immediate work.


1. Getting and setting data in the model

The model is currently being fed data associated to a particular “role”. Roles are Qt-speak for “key”, where each “key” has an associated “value”.

instance.data["key"] = "value"
qt["role"] = "value"

The primary difference is that roles are integers and can only be integers, which is why they are typically assigned a variable with a more descriptive name, such as QtCore.Qt.DisplayRole for values meant for display, which in our case is either instance.data["name"] or Plugin.__name__.

At the moment, data from instances and plug-ins are parsed into individual roles and entered into the model. The problem with that is that the model has no knowledge of where these roles came from or how to modify their original key.

For example.

  1. QtCore.Qt.EditRole is assigned instance.data["publish"]
  2. View fetches QtCore.Qt.EditRole and displays the status of a checkbox
  3. User modifies said checkbox
  4. The model should modify instance.data["publish"] but doesn’t know how to do that.

2. Delegates

There is one delegate at the moment, the checkbox. This checkbox is implemented such that an editor is persistently available on-top of its cell, the cell of which is in a QTableView.

Having an editor is convenient, as it provides an editable standard Widget which we can style normally via CSS.

On the other hand, the editor maintains its own state and later communicates this to the model. The model may then either reject or accept this change, but the editor couldn’t care less and so we must round-trip and tell it what has happened. This is not good model/view separation.

A better way, and one employed in Pyblish QML, is for the delegate to simply communicate that “The user just pressed me” and for control.py to decide what to do about it.

For this, I suspect we need to do our own drawing with QPainter, which shouldn’t be too difficult. The difficult part, and the one I am less familiar with, is how information travels between the model, view and delegate.

Here is one way of doing this.

from Qt import QtWidgets, QtGui, QtCore


class CheckBoxDelegate(QtWidgets.QStyledItemDelegate):
    def paint(self, painter, option, index):
        if index.column() == 0:
            # First column, we are painting a checkbox
            painter.save()

            # Draw hollow square
            path = QtGui.QPainterPath()
            path.addRect(QtCore.QRectF(option.rect))

            pen = QtGui.QPen(QtCore.Qt.white, 1)
            painter.setPen(pen)

            painter.drawPath(path)

            # Should we fill it?
            if index.data(QtCore.Qt.EditRole) & QtCore.Qt.Checked:
                painter.fillPath(path, QtCore.Qt.white)

            painter.restore()

        else:
            # Some other column, go on your business as usual.
            return super(CheckBoxDelegate, self).paint(painter, option, index)

As you can see, here the delegate is querying data from the model directly via the index; index.data(Role). Whether this is the way to go or not, I can’t say.


3. State Machine

At the moment, the footer buttons are explicitly hidden at the press of the reset or publish buttons, and later shown at the opportune time.

In a small GUI as this currently is, that’s ok. But as the amount of fork in the roads in terms of state start to grow, things will get hairy and we will need some method of managing this complexity.

As I was writing the above, a few ideas came to mind.

The project now looks like this.

pyblish-lite/     | The main Python package, containing a __init__.py
  font/           | Font assets, in .tff format
  img/            | Image assets, in .png format
  __init__.py     | 
  __main__.py     | This makes the module executable via `python -m pyblish_lite`
  app.css         | Application stylesheet
  app.py          | Main application source, to be divided into app.py and control.py
  control.py      | The C in MVC
  compat.py       | The module responsible for bridging PySide and PyQt bindings
  mock.py         |
  model.py        | The M in MVC
  util.py         | Generic, shared functionality
  view.py         | The V in MVC
README.md         | 
LICENSE           | LGPL

And you can run the --debug mode like so.

$ python -m pyblish_lite --debug


Delegate

Aside from layout changes, the main change here is the delegate and data flow.

Before, the delegate was an actual widget drawn ontop of the table cell, now it is painted with an invisible widget handling mouse interaction.

When the invisible widget is clicked, it handles communicating with the model which is then updated. As data in the model changes - i.e. the checkbox is checked - the paint method then properly reflects this.

Another significant change is how this change then propagates back onto the actual item; Instance or Plug-in.

At the moment, the Role is explicitly captured and parsed into the equivalent field of the item. CheckedRole feeds into instance.data["publish"] and Plugin.active. Whether this is a great approach or not I can’t yet say.

Ok, there’s an OK delegate in there now, and the fundamental skeleton for the project is available for you to tinker with.

I will take a backseat from here on out, and encourage you to familiarise yourself with the code and start contributing!


Install

$ git clone https://github.com/pyblish/pyblish-lite


Usage

You can use it standalone, or via a host.

Terminal

$ python -m pyblish_lite

Python

import pyblish_lite
pyblish_lite.show()

Maya

from PySide import QtGui
import pyblish_lite

parent = {o.objectName(): o for o in QtGui.qApp.topLevelWidgets()}["MayaWindow"]
window = pyblish_lite.show(parent)


Things missing

  • Checkboxes aren’t disabled when they should be; for example, when a plug-in has already been processed.
  • There are no labels
  • Compatibility is not taken into account; instances without a compatible plug-in still appear in the list.
  • There is no terminal
  • There are no status messages
  • Tests, in general, but also for PySide, PySide2, PyQt4 and PyQt5 respectively, and a few hosts, such as a couple of versions of Maya, via Docker should work well.
  • Documentation
  • Upload to PyPI

Have fun!

@mkolar, @Mahmoodreza_Aarabi, @tokejepsen, @linez, @BigRoy, @Lars_van_der_Bijl, @jedfrechette, @ljkart

Loads of updates, will post some gifs soon. Be sure to “Watch” the GitHub project for instant updates.

Here’s a usage guide for various hosts.

Maya

from PySide import QtGui

import pyblish.api
import pyblish_lite

pyblish.api.register_host("maya")

parent = {o.objectName(): o for o in QtGui.qApp.topLevelWidgets()}["MayaWindow"]
window = pyblish_lite.show(parent)

Nuke

import pyblish.api
import pyblish_lite

pyblish.api.register_host("nuke")

window = pyblish_lite.show()

Mari

from PySide import QtGui

import mari
import pyblish.api
import pyblish_lite

pyblish.api.register_host("mari")

mari.app.activateMainWindow()
parent = QtGui.qApp.activeWindow()

window = pyblish_lite.show(parent)

Houdini

ATTENTION: This will crash if run from the Python terminal.

import pyblish.api
import pyblish_lite

pyblish.api.register_host("houdini")
window = pyblish_lite.show()
1 Like

Boys this is starting to look great. I’ll have some comments (will put in proper issues), but overall I have a feeling this will be the way we’ll run pyblish here.

Just the ease of setup on it’s own is worth it. Call me old school, but I’m liking the lack of rpc :wink:

1 Like

Hi all,

Here’s some progress.

It has all things Pyblish QML except the perspective view, plus a few extras.

  • Artist view
  • Middle-click on any item to explore it’s properties
  • Comment section
  • Scrollbars
  • Select multiple items
  • Remembers checked state between refreshes
  • Toggle items via keyboard
  • Continue publishing after successful validation

Keyboard shortcuts

  • Select a single item to toggle
  • Drag, CTRL or SHIFT select to select multiple items
  • Invert check with Space
  • Toggle ON with Enter
  • Toggle OFF with Backspace
  • CTRL+A to select all

Artist View

A simplified view for artists, visualising just the instances.

The icon is customisable with any Awesome Font icon.

instance.data["icon"] = "random"

Icons are in their original name, minus the prefix fa-, found here: http://fontawesome.io/icon/random/

The remaining area is open for suggestions on what to include. Graphs? Timing information? Custom text, images?

Middle Click

In Pyblish QML, items in the terminal are expanded to reveal more information about any particular message, like at which module and line within that module it came from. This information is available via middle-click.

Comment

Add context.data["comment"] = "" and the GUI adds a widget to interactively modify that data member.

Pre-fill it for a custom placeholder or guidelines for how to comment. Press “Enter” to publish.

1 Like

Looking very good guys :smile:

To get this running standalone, would just be a matter of having PySide/PyQt installed?

pyblish-base along with any binding will do.

Or if you already have Maya, this will suffice.

# Windows
c:\program files\autodesk\maya2016\bin\mayapy.exe -m pyblish_lite

# Linux
/opt/autodesk/maya/bin/mayapy -m pyblish_lite

Thanks for this!

I haven’t been able to set icons, do I need to install fontAwesome separately or should it be bundled?

You are most welcome @morganloomis!

The way you set fonts has changed recently, sorry I haven’t updated this page with the latest information.

In short, you now set the name of an icon, as opposed to its unicode equivalent.

instance.data["icon"] = "random"

And yes, FontAwesome is bundled with Lite and isn’t something you need to think about installing. Let me know how that works for you.

Added a Documentation section to the project with the above information, this is what will be kept up to date with changes and new features.

Works a treat, thanks!